
PayQuicker
Simply Complete the Fields on the Form and Click Connect.
Connecting Pillars to the PayQuicker payment platform only requires completing the following four fields and one task as shown in Figure 5:
- ClientId
- Client Secret
- Funding Account PublicId
- PayQuicker Environment
- Whitelist the given IP Addresses
Steps:
- Click the login dropdown at the top right of the admin Back Office and select Manage Account. (See Image 1.) This takes you to the Pillars Portal.
- Click the Configure button at the far right on the row of the environment you want to configure. (See Image 2.)
- Click the gear icon at the top right of the Commission Payment Integration box. (See Image 3.)
- Select PayQuicker from the Payment Service dropdown menu (See Image 4.)
- Complete all the fields on the dialog seen in Image 5.
- Click the View IPs dropdown and click Copy All at the bottom of the dropdown. (See Figure 6.)
- Whitelist all those IP Addresses in your PayQuicker account.
- Click Connect at the bottom of the dialog to finalize the communication between Pillars and PayQuicker.
After completing these steps, you can click the Payables tab in the admin Pillars Back Office and pay out any existing payable commissions through PayQuicker.
Note: For payment to be successful, each person being paid must have already configured their PayQuicker account in that system.
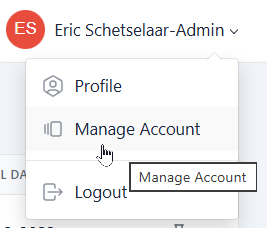
Figure 1
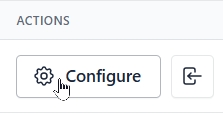
Figure 2
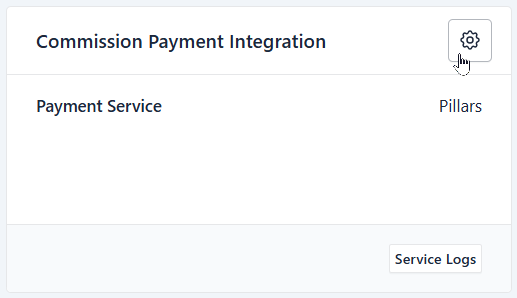
Figure 3
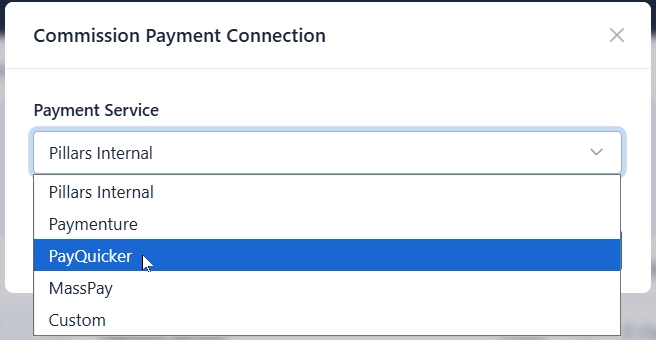
Figure 4
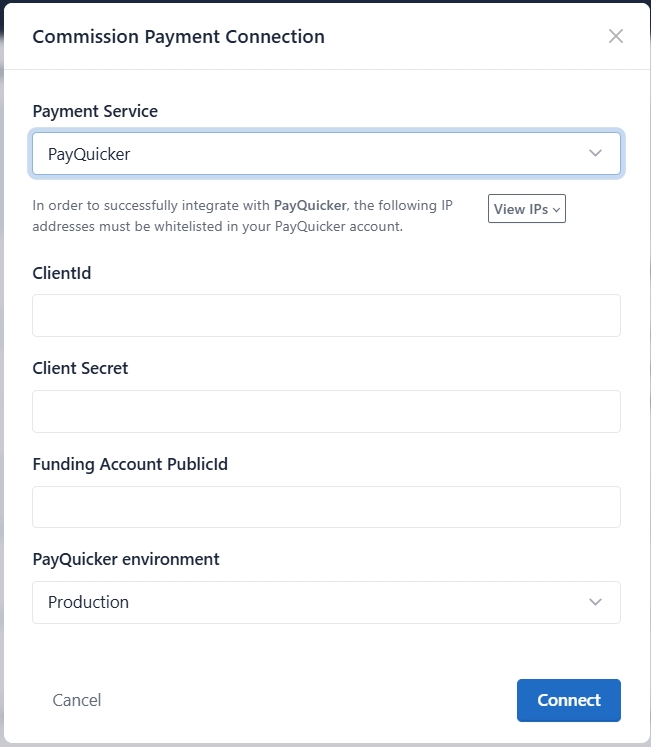
Figure 5
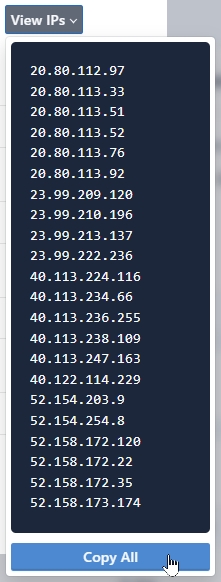
Figure 6
Updated 2 months ago
Did this page help you?