Generating an API Access Token
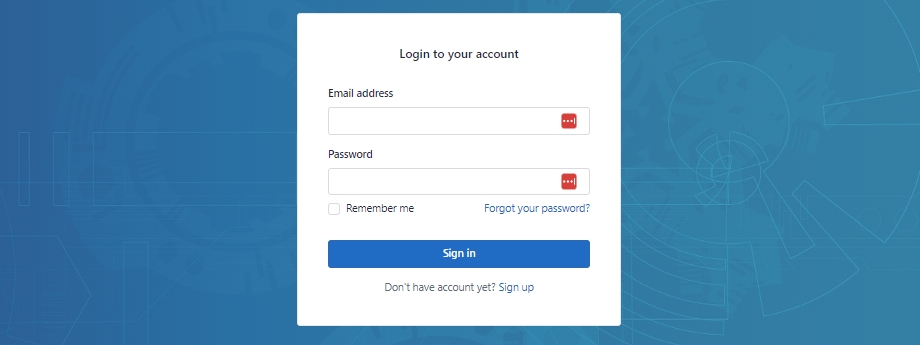
Login To Your Pillars Portal Account
To create an API Access Token, first login to your Pillars Portal Account at https://portal.pillarshub.com

Pillars Portal Account Login
Select the Application Environment For Your API Token
Click on the “Configure” button next to to Application Environment where you want the token connected.

Application Environment Selection
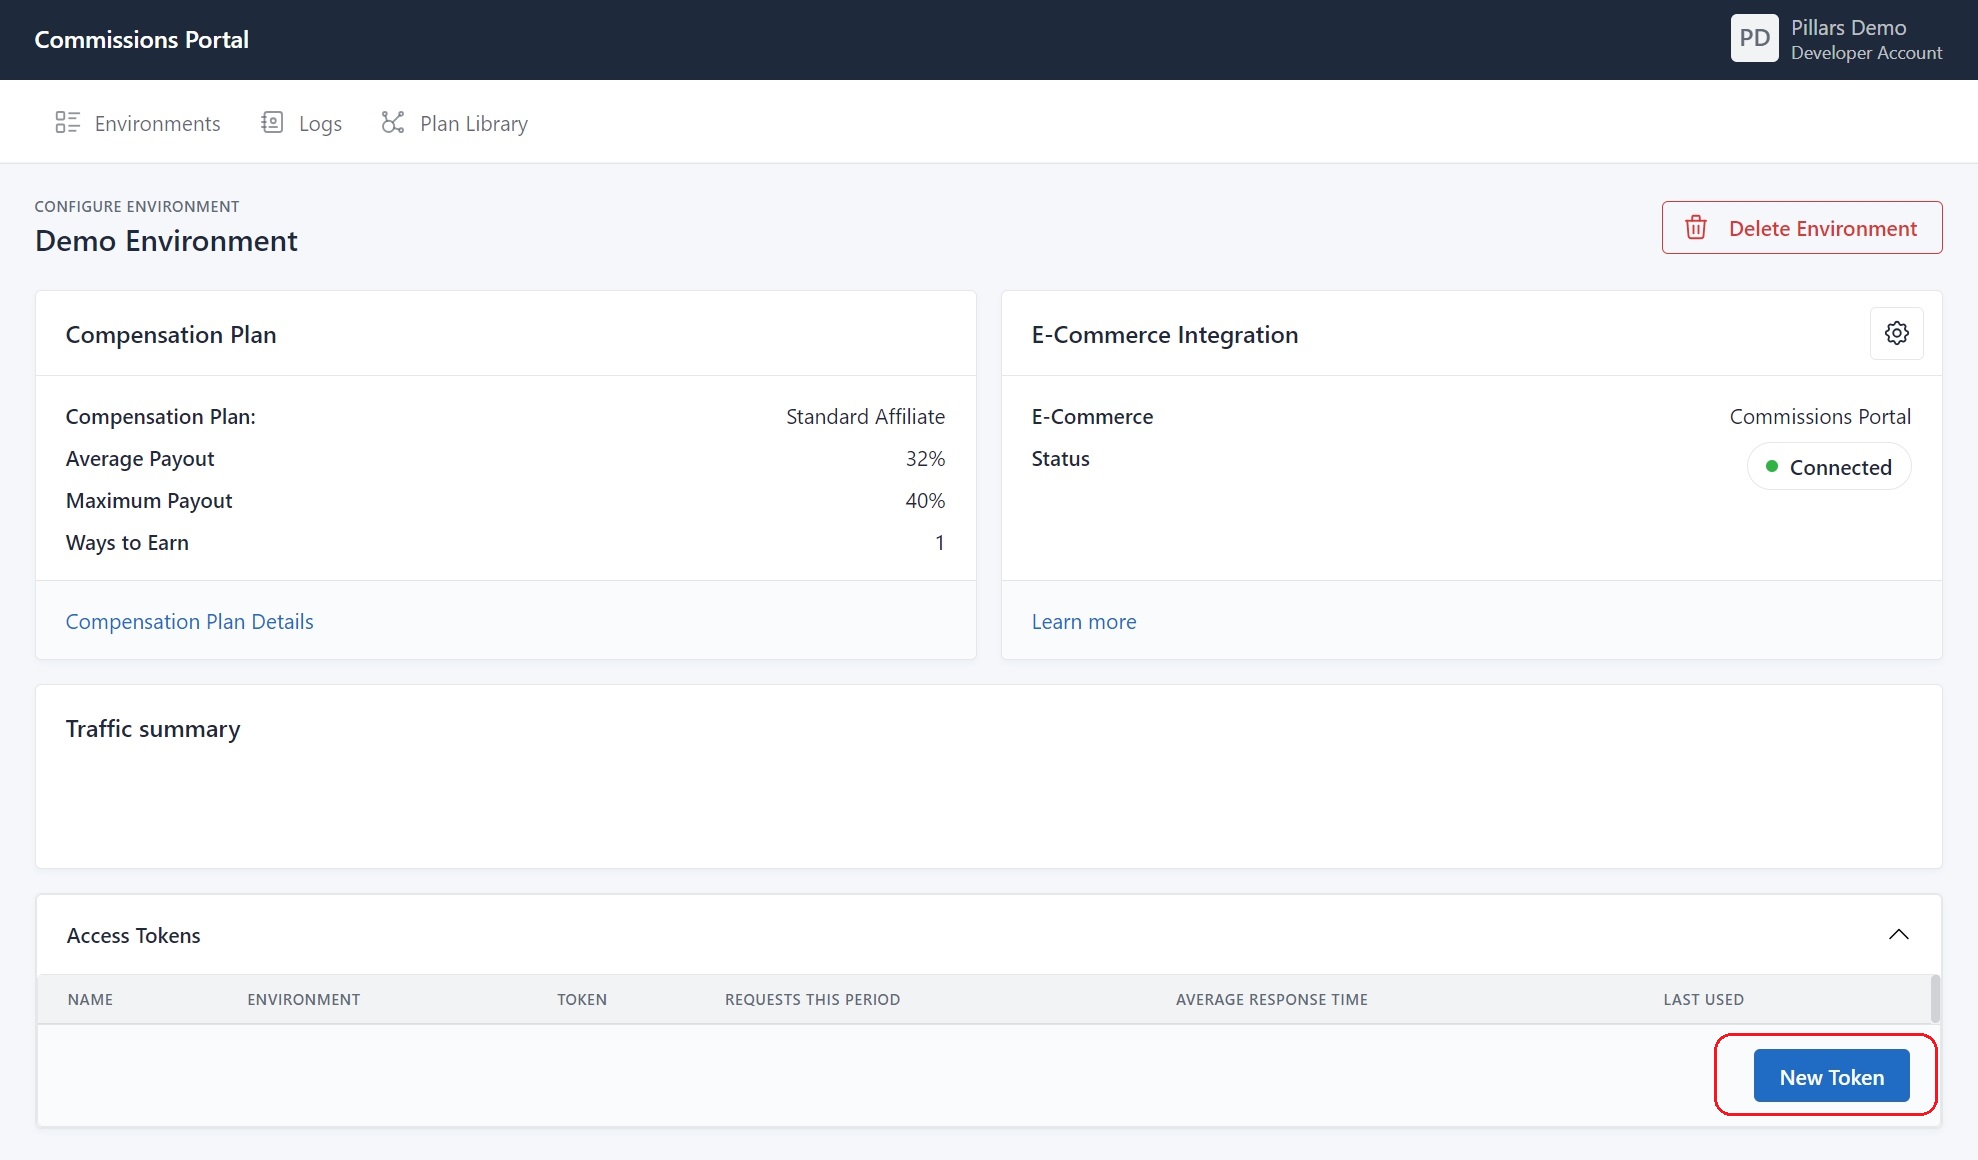
Create Your Token
Scroll down to the bottom of the selected Environment's configuration page, and you'll find an "Access Tokens" section and click on "New Token".

Generate an API Access Token
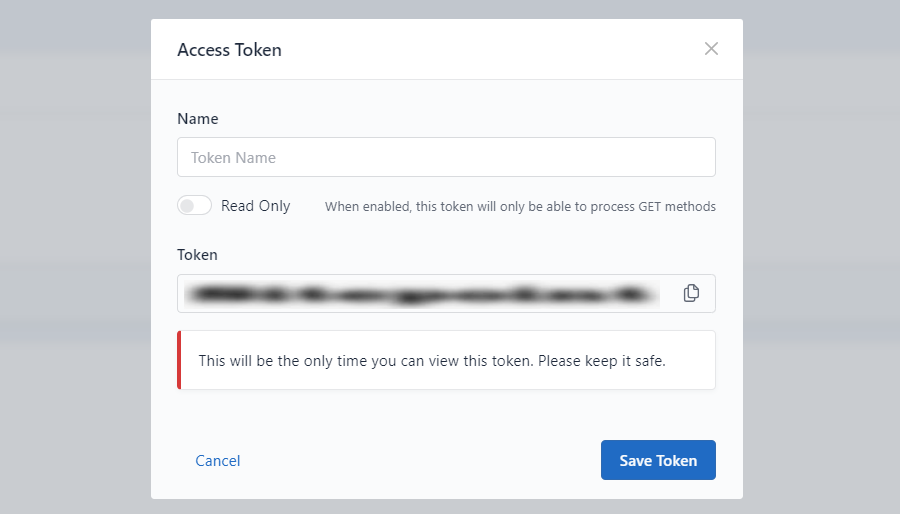
Name and Copy Your Token
After clicking "New Token", name it and choose whether you would like the token to be Read Only. Prior to hitting the "Save Token" button, make sure to copy your token as this is the only time you can view it in its entirety. Then save it to a secure location where it can be retrieved when needed.

Naming and Saving Your API Access Token
Token TroubleIf you experience any issues creating or managing your API tokens, please reach out to us at [email protected] for assistance.
Updated 12 months ago