Step 3: Configuring Your Pillars Application Environment
Initial Application Environment Setup and Configuration
With your new Pillars Application Environment in place, look for the “Configure” button to the right of your Environment's name and then click on it to continue the configuration process.

New Environment Configuration
You'll now see a notification on the left side of the Configure Environment page that says, “No Compensation Plan Configured.” Begin your compensation plan setup by clicking the “Set Up Compensation Plan” button.

Initial Compensation Plan Setup
Important Note About Compensation Plan SelectionSelecting a compensation plan template is a required step to finalizing your Pillars Application Environment configuration, but note that you will have the ability to customize your compensation plan to meet your unique needs.
Choose a Compensation Plan Template
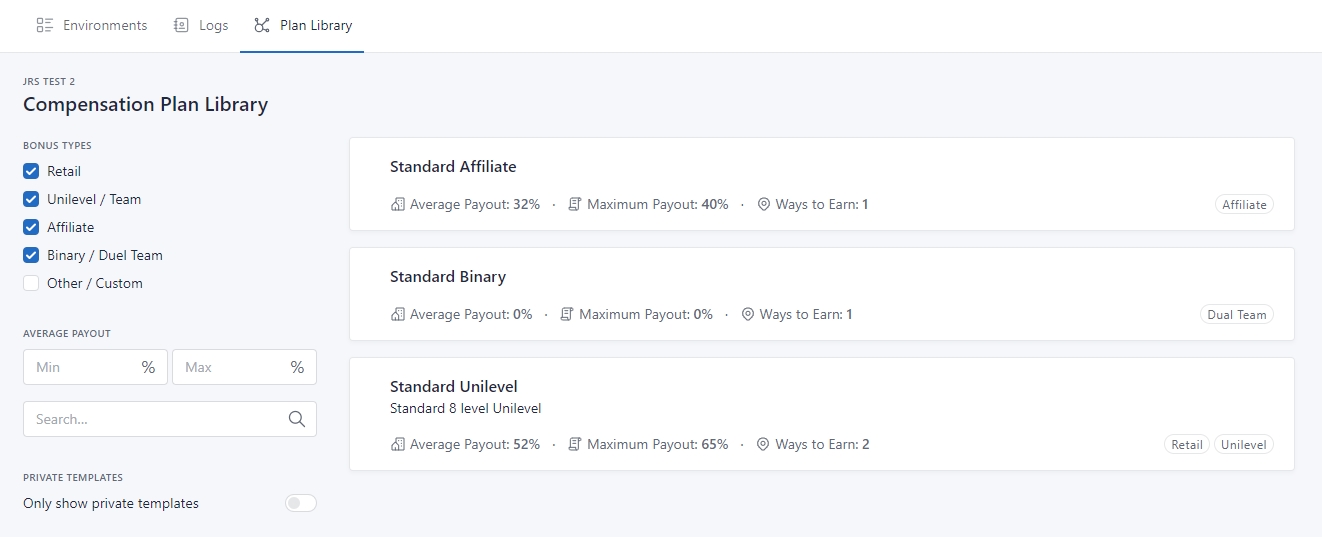
You will be presented with a collection of plan templates, complete with details and summary information. Browse these plans and select the one that aligns with your intended compensation strategy.

Compensation Plan Template Selection
Filtering and Private TemplatesOn the left side of the page, you’ll find several options for filtering the available templates.
- Bonus Types. Pick a compensation style that fits your needs.
- Average Payout. Adjust the sliders to define the range that matches your payout targets.
- Search. Enter specific terms to quickly find a plan that contains desired features.
- Private Templates. Just below the filtering options, you'll see a section titled "Private Templates." If you have your own custom compensation plan and you're not looking for a generic template, simply use this toggle to display your plan.
Assign Your Compensation Plan to Your Application Environment
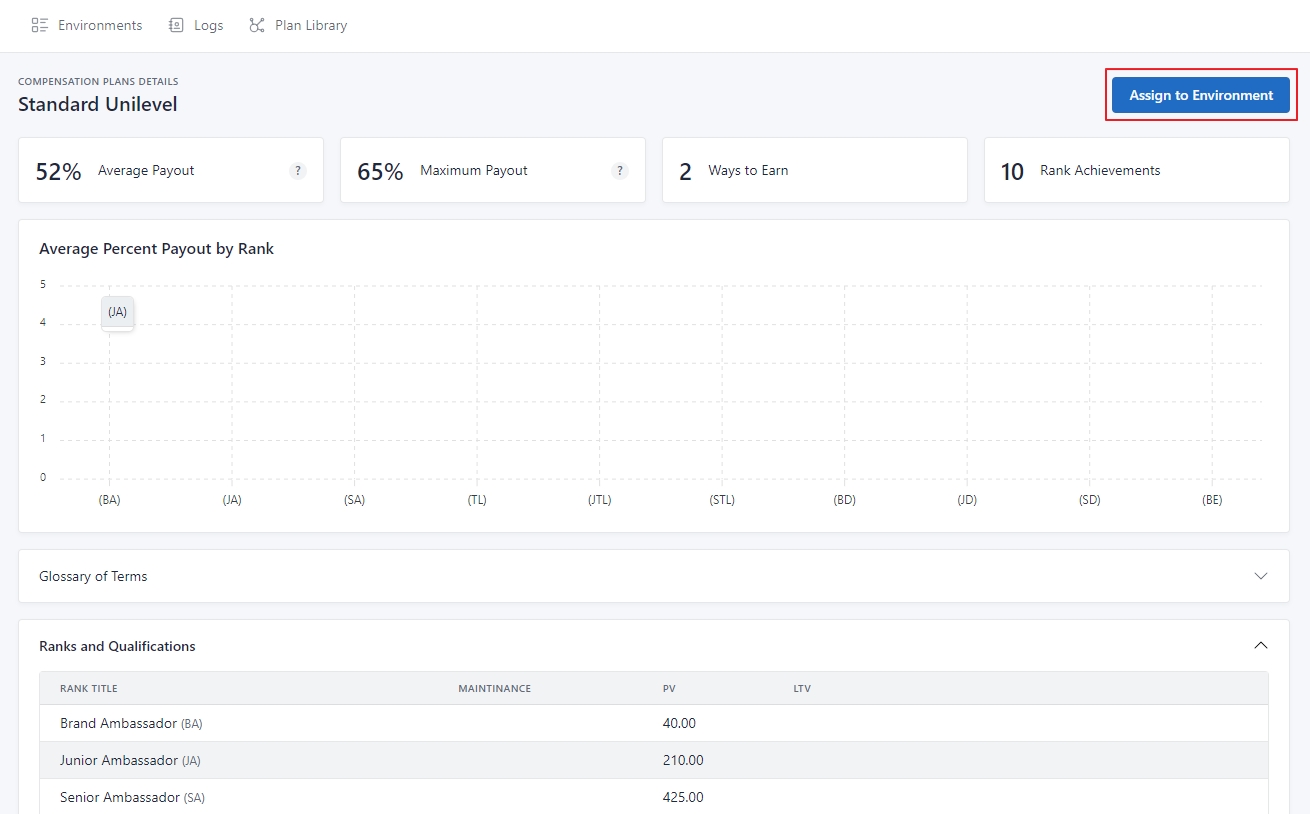
Once you choose a compensation plan template, you'll be taken to a page that provides an in-depth look at the specifics of the plan. This detailed overview includes average and maximum payouts, rank requirements, required qualifications, available bonuses, and a glossary of terms.
In the top right corner of this page, you'll notice an "Assign to Environment" button. Clicking this button will link your chosen Compensation Plan to your Application Environment, completing the configuration process and activating your Environment for use.

Compensation Plan Assignment
Managing Multiple EnvironmentsIf you have created multiple Pillars Application Environments, you will see each of them listed in a drop down and have the ability to assign the selected comp plan template to your preferred Environment.
Updated 12 months ago
Congratulations! You have now created a Pillars Portal Account, initialized and configured you first Pillars Application Environment, and are just a couple clicks away from using your Pillars Application.