
Getting Started With WooCommerce
WooCommerce is an open-source e-commerce platform built on WordPress. The WooCommerce API allows developers to interact with the WooCommerce store data programmatically.
To start using the WooCommerce integration, follow these steps:
1. Install and set up WooCommerce
Before you can start using the WooCommerce API, you need to have WooCommerce installed and set up on your website.
2. Creating API Keys in WooCommerce
Creating API keys in WooCommerce is a simple process that involves just a few steps. Here’s a step-by-step guide to creating API keys in WooCommerce:
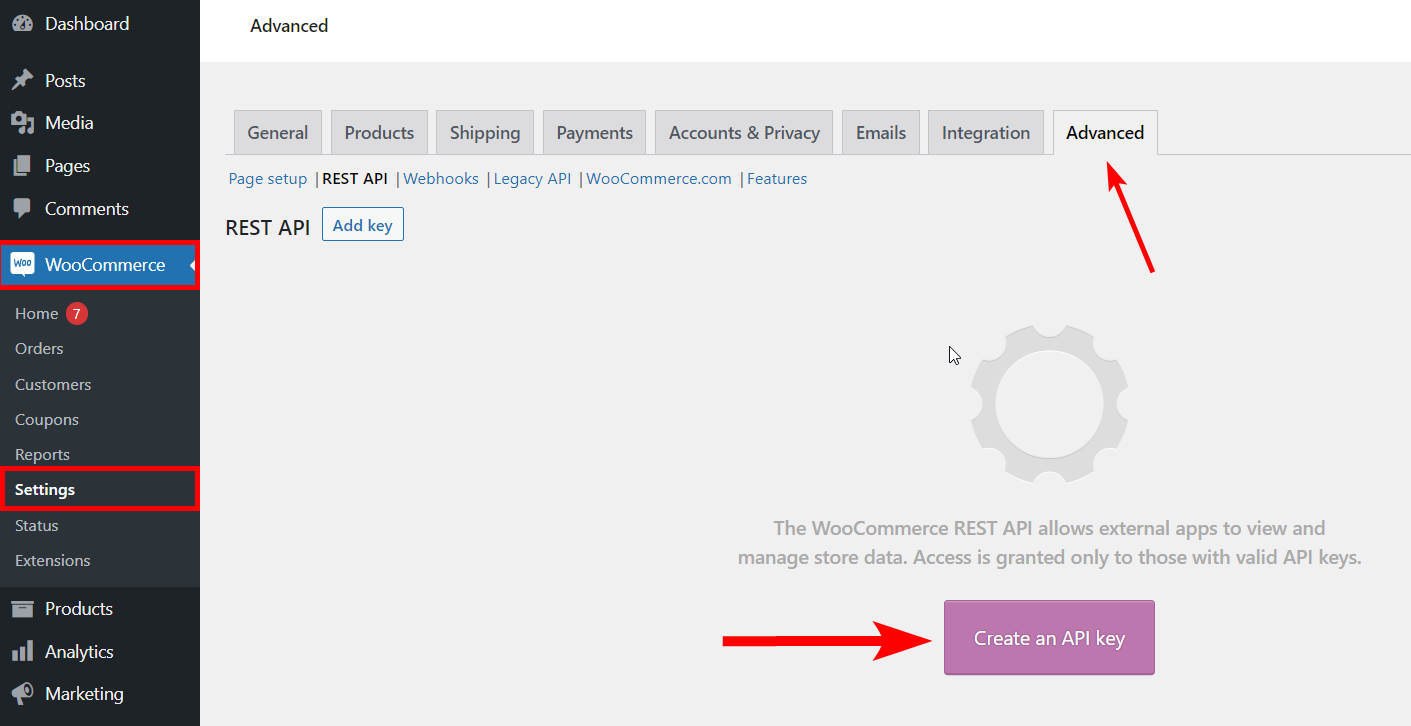
- Log in to your WordPress dashboard and navigate to WooCommerce → Settings.
- Click on the Advanced tab and then click on the REST API tab.
- Click the Add Key/Create an API Key button to create a new API key.
- Enter a description for the API key in the Description field.
- Select the user from the User dropdown list to associate with the API key. You may need to create a new user if you don’t see the user you want to use.
- Choose the permissions you want to grant the API key from the Permissions dropdown list. Pillars will need Read/Write or Read-only permissions.
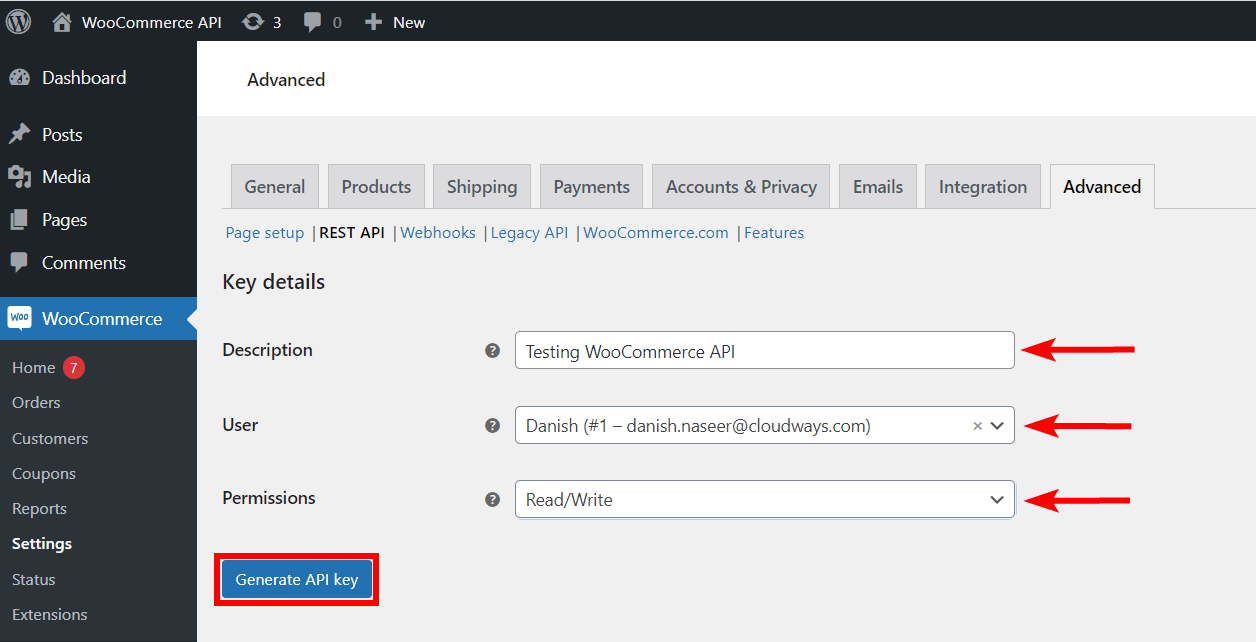
- Click the Generate API Key button to generate the API key.
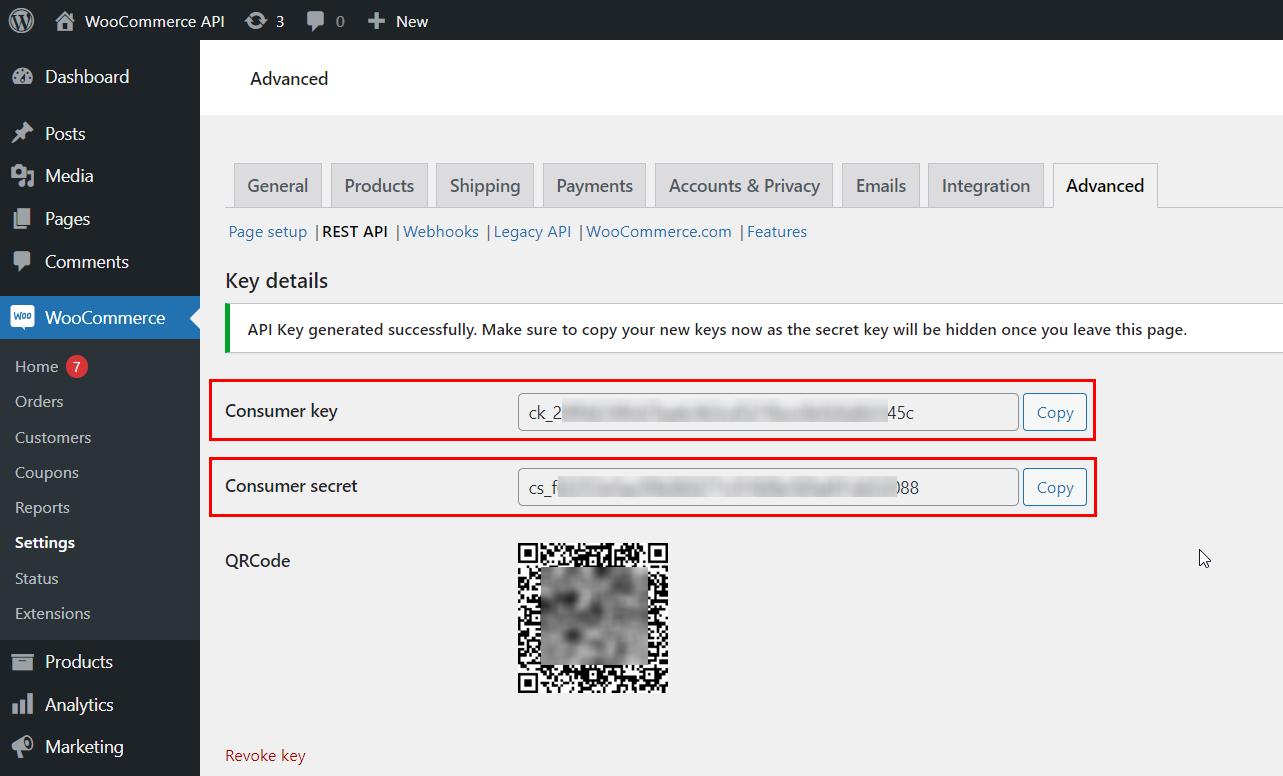
- Make sure to copy the Consumer Key and Consumer Secret values and save them somewhere secure. You will need them in the next step and you won’t be able to view them again.
3. Application Environment Setup and Configuration
With your new Pillars Application Environment in place, look for the “Configure” button to the right of your Environment's name and then click on it to continue the configuration process.
- In the panel labeled "E-Commerce Integration", select the gear icon to bring up the e-commerce configuration dialog.
- In the e-commerce drop down, select "WooCommerce".
- Enter the Root URL to the WooCommerce instance.
- Enter the Consumer Key and Consumer Secret generated in step 2.
- Click "Connect E-Commerce"
After a short wait, your Pillars environment will now be connected to your WooCommerce instance.
Updated over 1 year ago
Did this page help you?